Category Archives: Granny Squares
Granny Square #9
I AM OFFICIALLY CAUGHT UP ON MY GRANNY-A-DAY RESOLUTION! I think that deserves a glass of wine. In 6 hours. When I get home from work. And it’s not 11:39 in the morning on a Thursday.
This is square #5 for my black edged, multicolored granny square blanket, using a J/6.00 hook for 5 rounds and measuring about 5 in x 5 in a square.
I am totally obsessed with the multicolored yarn in the second round. I picked it up at Michael’s, I can’t place the brand but it was something super cheap sounding. And actually cheap. I think a small, 3oz skein was like $2.29. It looks so cool in this square, although I wish I would have chosen a lighter color for the first round instead of maroon so the multicolor popped a little more.
Oh well, another day, another dollar square.
You can find the pattern for this Basic Granny Square here and steps to changing colors here.
Granny Square #8
Granny Square #7
Granny Square #5
This is a square for my black edged, multicolored granny square blanket, using a J/6.00 hook for 5 rounds and measuring about 5 in x 5 in a square.
You can find the pattern for this Basic Granny Square here. To change colors, I fastened off the first color then tied the next color onto the next corner space with a simple knot. To make the first chain of the new color, I just inserted my hook from front to back in the corner space where I just tied on the new color, yarn over and pull a loop up to act as your slip stitch. Start the pattern like normal from here.
Granny Square #4: Flower Power
After several failed attempts at a spiral bobble granny square, I settled on this flower pattern that I found here on a great page that offers several free granny square patterns. This pattern uses two rounds of petals, made with a series of bobbles and chains to create this cool, 3D effect.
In the first round, I crocheted the bobbles the only way I knew how (*yarn over, insert hook, draw up loops, pull through first two loops on hook* x 4). The original pattern instructed to make each petal using a different take on the bobble (5 dc in same stitch, drop last loop, insert hook in 3rd chain at the beginning of the 5 dc, pick up dropped loop, yarn over and pull through two loops). This sounded like way more effort than the simpler bobble stitch I’ve done a thousand times so I decided to try my way first.
I’m not totally sure what the difference is between these two ways of creating a bobble but I would be super appreciative if someone could fill me in! I was so paranoid the whole time I was doing my bobble version that I ended up unraveling the first half of my work to start over with the other bobble. Ugh, I’m such a rule follower.. but I think it paid off, because look how pretty it turned out!
Here’s one more thing to watch out for. In the entire first round of yellow petals and half of the pink petal round, I was inserting the hook into the first dc of the bobble instead of what I should have been doing, which is inserting the hook into the 3rd chain before the first dc in each petal. You can’t really tell, but if you look closely, you can see that some of the pink petals have a bit of a sharper end point than the others, giving it a cleaner look.
Materials:
- G/4.25mm hook
- 2-3 colors of yarn (I used Super Saver Pale Yellow, Super Saver Raspberry and a blue and purple multicolor I Love This Yarn that I had a few yards of scrap yarn left)
Stitches Used:
- Chain (ch)
- Slip stitch (sl st)
- Single crochet (sc)
- Double crochet (dc)
- Treble/Triple crochet (tc)
Need a refresher on the stitches used? Check out the Stitch Tutorials.
You can find the original pattern here if that’s easier for you to follow along with.
Start by chaining 4 and use a slip stitch in the chain farthest from your hook (closest to the slip stitch tail) to make a circle.
Round 1
Ch 1, 7 sc in circle you created then slip stitch in the ch 1 to join the round.
Round 2
Ch 3, *5 dc in same sc, drop last loop from hook, insert hook from front to back through the 3rd chain before your 5 dcs and also pick up your dropped loop, yarn over and pull through both loops, ch 3* Repeat this petal pattern in each sc for a total of 8 petals. Sl st in 3rd chain to join the round.
Round 3 (change color by fastening off first color and tying on second color, if desired)
Ch 3, crochet two petals in each ch 3 space. Make sure to ch 3 between each flower petal. This should give you a total of 16 petals. Sl st in 3rd chain to join the round. Fasten off.
Round 4 (tie on background color and pull up a loop with a slip stitch)
*3 dc in each of the first three chain 3 spaces, [3 tc, ch 2, 3 tc] in the next ch 3 space (this creates your corner)* Repeat this pattern 3 more times to build a square around your circular petals. End with a sl st in the 3rd chain to join the round. Fasten off.
I really enjoyed making this granny square and will probably use it to make a larger project. It’s really simple to get the hang of and looks beyond rad.
Granny Square #3: The Sunburst
As a novice crocheter, I never knew if I crocheted ‘tightly’ as many patterns would mention in regard to hook size and gauges. Well, now I know. I crochet very tightly, too tightly in fact for anyone to make a ‘puff stitch’ with any semblance of ease. Please keep this in mind when you are trying this stitch in this granny square or any projects.
After this realization, I started making my steps in the puff stitch noticeably looser to make it easier to pull the final loop through the 7 loops on the hook. This is especially important for the third pull through, since the last two loops you create on your hook were the for sure the tightest in my experience. One trick that helped me was before each yarn over in the puff stitch, push your hook as far away from your work as you can. This helps to loosen the stitches without sacrificing the tightness of your piece as a whole. If you need a refresher on the Puff Stitch, look no further!
Puff Stitch: Yarn over, insert hook in desired stitch, yarn over and pull loop through. Do this a total of three times so that you have 7 loops on your hook. Finally, yarn over and pull through all 7 loops on your hook. Chain 1 at the end to hold the stitch in place before proceeding to the next stitch.
For all my visual learners, check out this easy-to-follow puff stitch video in my Stitch Tutorials.
Okay so I am definitely a fan of the Bobble/Cluster Stitch over the Puff Stitch. Forget you, Puff. Here’s how to make a Bobble/Cluster:
Bobble/Cluster Stitch: Yarn over, insert hook in desired stitch, yarn over, pull loop through stitch (now you should have three loops on your hook). Pull through the first two loops on the hook (now you’ll have two loops on your hook). Repeat this process (yarn over, insert in stitch, yarn over, pull through stitch, yarn over, pull through first two loops) a total of 4 times until you have 5 loops on your hook. Finally, yarn over and pull through all 5 loops on hook.
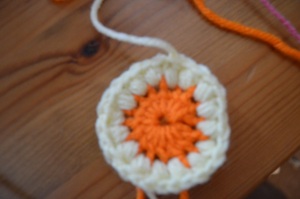
No onto the Sunburst Granny Square. I found a great step-by-step tutorial here. Great blog with great instructions that any newbie can follow without trouble. They also explain every stitch before the pattern so you know what you’re getting yourself into. Speaking of that..
Materials:
- 4 colors of medium worsted weight yarn (I used Red Heart Super Saver Pale Yellow, Light Raspberry, White and Orange)
- Size G 4.25mm hook
- Tapestry needle to weave in ends
Stitches Used
- Magic ring
- Chain (ch)
- Slip Stitch (sl st)
- Double Crochet (dc)
- Half Double Crochet (hdc)
- Triple/Treble Crochet (tc)
- Puff Stitch
- Bobble/Cluster Stitch
Check out my Stitch Tutorial page for links to video tutorials and descriptions of each stitch used in this pattern.
Sunburst Granny Square Tutorial–original pattern (with some pretty rad visuals) can be found here!
Granny Square #2: Sir Basic, the Third
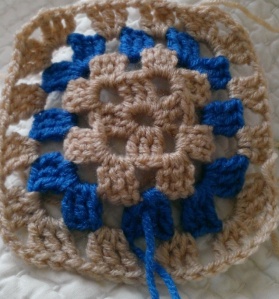
 I found this Granny Square pattern here through Pinterest. The video tutorial is super difficult to follow along with because the instructional text flashes past the screen really quickly. However, they do offer a photo stream tutorial version here that is much easier to work along with!
This pattern is very similar to the first Granny Square I posted. It is another take on the traditional Granny Square, using triple crochet/treble crochet instead of double crochets. If you want a great tutorial on the treble stitch, check it out in my Stitch Tutorials section.
I used a G hook (4.25mm) and it’s measuring a bit larger than the Basic Granny Square. I am going to try this again using an F hook to get it closer to the size of my first square. I’ll update this post with new pictures when I complete that!
Materials:
- F hook (3.5mm)
- Two colors of yarn (I used Red Heart’s Super Saver Buff and Blue)
- Tapestry needle to weave in ends
Stitches Used and Abbreviations:
- Chain (ch)
- Triple/Treble crochet (tc)
- Slip Stitch (sl st)
- Main color (mc)
- Contrasting color (cc)
Start by chaining 6 with mc, sl st in last chain (farthest from hook) to form a ring
Round 1: Ch 3, 2 tc in center of ring, ch 2, *3 tc, ch 2* repeat 3 times, slip stitch in top of chain to join
Round 2: Ch 3, 2 tc in first gap closest to base of the chain,*ch 1, 3 tc in next gap (corner), ch 3, 3 tc in same corner stitch* repeat all the way around, sl st in top of chain to join. Fasten off with a slip stitch.
Round 3: Change colors. Tie or join with sl st in one of the side gaps (not the corner). Ch 3, then you can continue this pattern all the way around the square starting with 2 dc, ch 1 in first gap by chain. Then, 3 tc and ch 1 in middle gap on each side of the square. 3 tc, ch 3, 3 tc in each corner of the square. Sl st in top of chain to join. Fasten off with sl st.
Round 4: Switch back to mc. Repeat pattern used in round 3. Weave in ends
Another cool variation to this would be to use the main color in first 4 rounds then chain color for the 5th round only. I believe this is the pattern suggested in the original blog post. If you plan to make 6 rounds, definitely use a smaller hook (unless you want giant granny squares!).
Got a question? Want to show off your own version? Get at me: thinairandyarn@gmail.com
Granny Square #1: The Basic
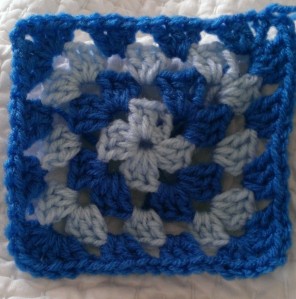
 I decided to start my granny square adventure with the most basic. I’ve been making a shit ton of these squares for another giant project–I’ll make sure to post about that soon!
I used this super awesome tutorial (video and pictures included!) from a dude with some serious crochet skills. The video is a little easier to follow along with if you’ve never made a granny square before but beware, it goes very slowly for the more experienced crocheter.
Crocheter.. is that a word? Crochetess? Crochetpeople? Crochetian? Hm, another day, another post.
Anyway! This pattern is ridiculously easy to memorize so you don’t have to constantly follow a pattern and very customizable. Use any color combination you want and continue to make as many rounds as you want to achieve your desired size!
Materials:
- Any medium worsted weight yarn (I used Red Heart Super Saver Light Blue and Red Heart Super Saver Blue)
- I hook (5.5mm)
- Tapestry needle
Stitches Used:
- Chain (ch)
- Slip stitch (sl st)
- Double crochet (dc)
Ch 4, sl st in first chain (farther from hook) to form a ring (this is where you’ll work the first round of stitches)
Round 1: 2 dc into the hole you just made, ch 2, *3 dc, ch 2* repeat 3 times, sl st in second chain to join (if you are alternating colors, fasten off with join next color with sl st)
Now you should have a small square shape with an opening from the ch 2 in each of the four corners. 
Round 2: ch 3 (counts as first dc), 2 dc in corner space at the base of the ch 3, ch 1, *3 dc in next corner space, ch 2, 3 dc in same corner space* repeat around, sl st in second chain to join
If you are working in a corner space: 3 dc, ch 2, 3 dc, ch 1

If you are NOT working in a corner space: 3 dc, ch 1
Continue this same pattern for as many rounds as you’d like! My granny square has a total of 4 rounds. When you’ve reached your desired size, fasten off with a slip stitch and weave in ends.
Have a question about this pattern? Get at me: thinairandyarn@gmail.com


